


Parenting
Mastering Baby Bottle Prep: Essential Tips Every New Parent Needs to Know
If you’ve ever found yourself in the throes of sleep deprivation at 2 AM, frantically typing “how to prepare a baby bottle” while trying to soothe your crying little one, you’re definitely not alone. I’ve been there too, wrestling with a can of formula in one hand and cradling a hungry baby in the other, questioning how something that seems so simple can suddenly feel impossible.
Whether you’re exclusively bottle feeding, breastfeeding, or navigating the in-between world of mixed feeding, getting your baby’s milk prepared safely is a priority. It’s completely normal to feel overwhelmed by the process, especially in those bleary-eyed moments. But there’s good news! With a bit of practice, bottle preparation can become second nature, a rhythm you’ll find comfort in.
To help demystify bottle preparation, we reached out to Lucy Upton—a certified pediatric dietitian and feeding specialist who brings a wealth of knowledge and experience to the table. With her guidance, we’re here to break it all down for you, from the basics of late-night feeds to mixing formula while on the go.
Before diving in, let’s make sure you have the right tools and steps down pat for preparing a formula feed. The first, and perhaps most crucial, step is to ensure all your bottles, teats, and any other feeding equipment are clean and sterilized. This is essential to minimizing the risk of infections, which can lead to complications that you certainly want to avoid during these critical early months.
The NHS recommends that you continue to sterilize baby bottles and teats until your little one is at least 12 months old, which helps protect their developing immune system. Here are some key items you’ll need for safe and effective preparation:
– A kettle: Using fresh tap water is a must, and you should always boil it to ensure it’s safe for your baby.
– Formula milk: Choose a formula that’s age-appropriate for your baby and strictly follow the manufacturer’s instructions for mixing it.
– Sterilized bottles and teats: They must be properly cleaned and sterilized to reduce the risk of any germs or bacteria getting to your baby.
– Vacuum flask and portable formula container: These helpers are super handy when you’re out and about. They keep your boiled water at the right temperature for mixing on the fly.
Once you have all your supplies ready, you’re set to safely prepare your baby’s feed! Let’s break it down into simple steps:
1. Fill the kettle with fresh tap water: Make sure you use at least 1 liter. “Never use water that has already been boiled,” Lucy says, “as it can concentrate certain minerals that aren’t ideal for your baby’s developing kidneys.” This is a small but important detail that can make a big difference in your infant’s health.
2. Boil the water and then let it cool: After boiling, allow the water to cool for no longer than 30 minutes, ensuring it stays at a temperature of 70°C or above. “This step is crucial as boiling the water helps eliminate any harmful bacteria that may be lurking in the powdered formula,” Lucy clarifies.
3. Clean and sanitize your preparation area: Make sure the surface you’re working on is clean. A quick wipe down with a disinfectant can prevent any unnecessary exposure to germs.
4. Wash your hands thoroughly: It might feel a little repetitive, but washing your hands with soap and water before handling anything is a must for safety.
5. Prepare your sterilized bottles: If you’re using a cold-water sterilizer, shake off any excess solution or rinse the bottles and teats with your cooled boiled water.
6. Position the bottle on the sanitized surface: Make sure everything is prepped so you can work swiftly and avoid any spills.
7. Begin with hot water: Pour the right amount of hot water into the bottle before adding the formula powder. This is important for both dissolving the formula effectively and reducing any bacteria.
8. Accurately measure the formula: Use the scoop that comes with your formula brand, fill it loosely, and then level it off using the straight edge of a clean knife. Stick to the suggested powder-to-water ratio; getting this wrong can affect your baby’s nutrition and hydration.
9. Secure the teat and lid: Properly fitting everything ensures there are no leaks, making the feeding process smoother.
10. Shake thoroughly: Mix until the formula is completely dissolved with no lumps left behind.
11. Cool the bottle: Run the bottle under cold water (keeping the lid on) until it feels just warm to the touch.
12. Test before feeding: Dribble a tiny amount of the mixture onto the inside of your wrist; it should never be hot, but comfortably warm.
13. Dispose of any leftovers: “After a feeding, any leftover formula should be thrown away after two hours,” Lucy warns, “to prevent any bacterial growth.”
Now let’s talk about how to manage bottle prep while you’re on the go. Things get real when you’re out in public, and being prepared keeps stress levels low. Lucy’s tip? “When you’ve got things to do outside the house, carry a vacuum flask filled with freshly boiled water along with a sterilized container containing the right amount of formula powder. Mix the formula as needed, ensuring the water temperature is at least 70°C when you’re combining it with the powder.”
And don’t forget, ready-to-use liquid formula can be a lifesaver for when you’re in a pinch!
When late-night feedings call for your attention, consider pre-preparing bottles. It’s a simple tactic that can save you some sanity. Lucy suggests, “Make a bottle ahead of time and refrigerate it at 5°C or below for up to 24 hours. When it’s time to feed, just warm it up using either a bowl of warm water or a bottle warmer.” Remember, microwaves can create dangerous hot spots, so steer clear of that method.
You might be asking: can you prepare bottles in advance? Absolutely! But stick to these guidelines to keep things safe and sound:
– Cool freshly prepared bottles quickly (within an hour) and put them in the fridge.
– Aim to use them within 24 hours of refrigeration.
– Once you’ve warmed a bottle, use it within two hours and avoid reheating it more than once to keep everything safe.
Finally, let’s wrap up with some essential dos and don’ts for preparing a baby bottle:
DO:
– Follow the manufacturer’s instructions closely—never add more powder or water than recommended.
– Make sure to use freshly boiled water that has cooled to 70°C.
DON’T:
– Steer clear of using bottled water, as it may contain high levels of sodium or sulfate.
– Don’t leave prepared bottles out at room temperature for too long.
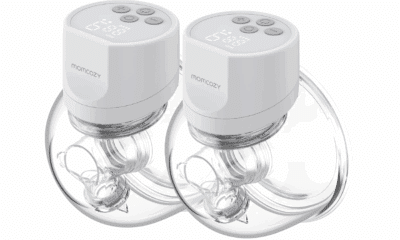
For breastfeeding mothers who are pumping and storing milk, proper handling is just as critical. Lucy offers these handy storage tips:
– Fridge (at 4°C or lower): You can safely keep breast milk for up to 8 days, or just 3 days if the fridge temperature goes higher.
– Freezer (at -18°C or lower): Breast milk can be stored here for up to 6 months without losing its nutritional benefits.
– Always label your bottles with the date to ensure the older milk gets used first!
We get it—parenting can feel like a whirlwind. But with a little preparation and the right knowledge, even the most overwhelming tasks, like preparing a baby bottle, can become manageable. Remember that you’re not alone in this journey; we all have our moments of chaos and confusion. Just take it step by step, and soon you’ll find your rhythm!